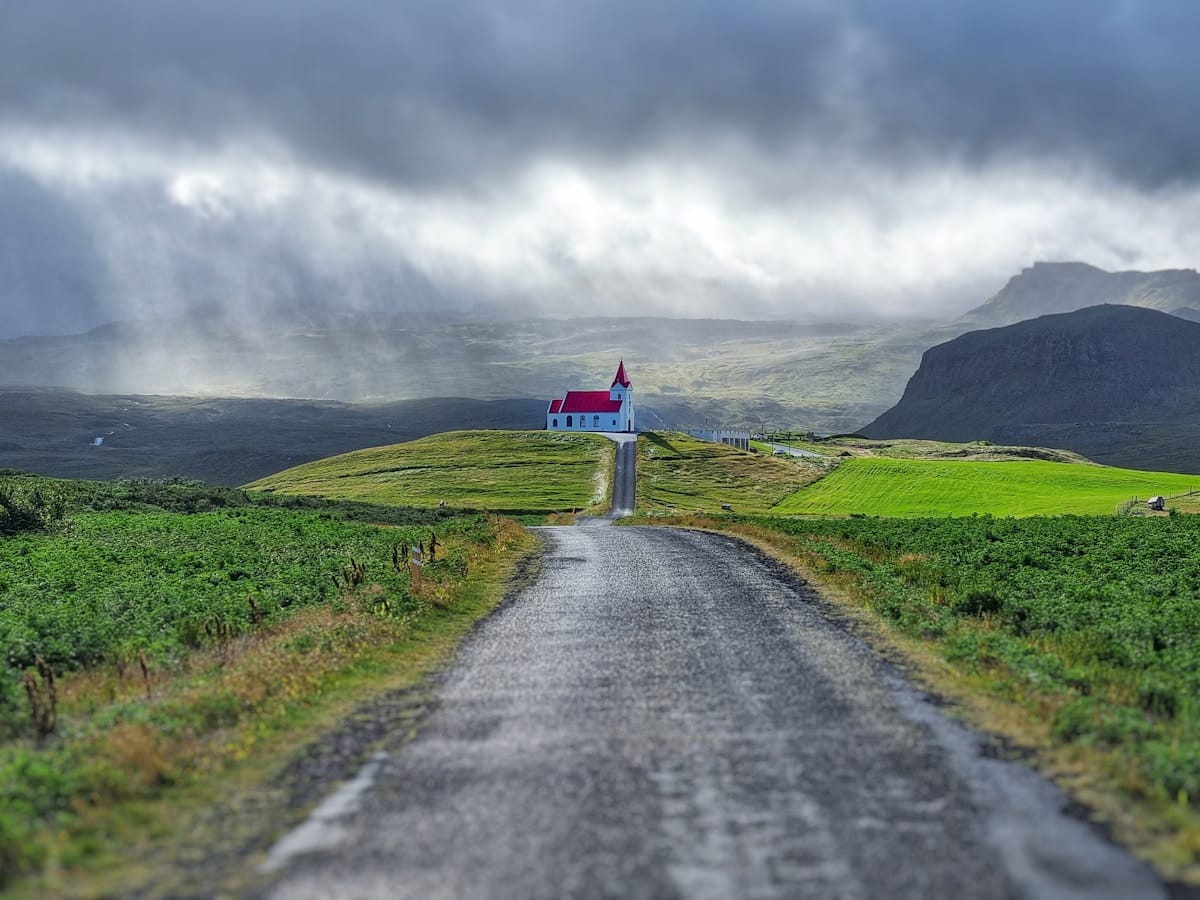
Iceland presents a paradox for photographers. The light here is extraordinary — low-angle for most of the year, golden hour stretching for hours rather than minutes, and in winter the additional spectacle of the aurora. But the conditions are genuinely demanding: wind that strips warmth from exposed skin within minutes, saltwater spray at coastal locations, and temperatures that exhaust batteries faster than anywhere in Europe.
Getting the shots you came for requires understanding the rhythm of Iceland’s light across the seasons, knowing which locations reward patience, and protecting your gear from conditions that will damage unprotected equipment within a single session.
Understanding Iceland’s Light by Season
Iceland’s extreme latitude (64°N) means the character of daylight shifts dramatically across the year.
Winter (November–February): The sun rises late (around 10:30–11:00am in Reykjavik) and sets by 3:30–4:00pm, but during those short hours the light stays low and warm — the blue hour before sunrise and after sunset extends for 30–40 minutes at each end, and what photographers elsewhere chase for 15 minutes lasts far longer here. This is also the only reliable window for northern lights: aurora requires genuine darkness, which rules out the summer months entirely.
Spring (March–April): Rapidly lengthening days, with snow still on the ground at higher elevations. The combination of snowfields and strengthening sunlight produces dramatic shadows and strong contrasts. Waterfalls run at high volume from snowmelt. Sunrise moves from around 7:30am in March to 5:30am in late April.
Summer (May–August): The midnight sun period means near-continuous golden light from late May through mid-July. Sunset blends into sunrise with only a brief dip to a golden-blue dusk around midnight. Landscapes and waterfalls are fully accessible, wildflowers are in bloom, but northern lights are impossible. The Westfjords and Highlands become reachable on F-roads.
Autumn (September–October): The first aurora windows return by late September as darkness falls again. Foliage on birch trees turns yellow and orange. This is arguably the most photogenic window — the possibility of aurora, reasonable temperatures, and long golden evenings combine well.
Northern Lights Photography
Shooting the aurora requires the right conditions and the right technique.
Required conditions: A Kp-index of at least 2–3 (check aurora.fmi.fi for real-time forecasts), clear skies, and genuine darkness — meaning you need to be outside Reykjavik’s light pollution or at its edge. Darkness only arrives between September and March.
Best locations for aurora:
- Kirkjufell mountain (Snæfellsnes Peninsula): Iceland’s most photographed mountain. The double waterfall in front of the conical peak creates a perfect foreground. The site is easily accessible off Route 54 and has a small parking area. Reach it before 10pm on a clear night — other photographers will be there, but the location accommodates several shooting positions.
- Jökulsárlón glacier lagoon: The icebergs act as natural reflectors for the aurora’s green and purple light. Arrive during the blue hour window and stay through midnight — the combination of moving ice and overhead light is unlike anywhere else.
- Þingvellir National Park (Thingvellir): 45 minutes from Reykjavik, the national park is dark enough on clear nights and the Öxará river provides good foreground interest. The lake also reflects aurora well.
- The Westfjords: Remote and spectacularly dark. If you’re based in Ísafjörður during a clear winter night, the fjord setting provides dramatic compositions.
Aurora photography technique:
- Use manual focus set to infinity (check by zooming into a distant star live view)
- Aperture: f/1.8–f/2.8 — wide open to gather light
- ISO: 800–3200 depending on aurora brightness; start at 1600 and adjust
- Shutter speed: 8–15 seconds for sharp stars; above 20 seconds, brighter auroras start to blur
- White balance: 3,800–4,200K gives a natural rendering; avoid Auto WB which can flatten the greens
- Bring hand warmers — cold fingers and precise manual settings are a poor combination
Waterfall Photography
Iceland has more waterfalls per square kilometre than almost anywhere in Europe. Three in particular are benchmark subjects for travel photographers.
Seljalandsfoss (South Iceland, Route 1): Famous for the path that circles behind the curtain of water, giving a view looking out through the fall. The behind-the-falls position requires a wide-angle lens (16–24mm) and a patience-testing degree of getting soaked — bring a rain cover for your body, microfibre cloths for your lens, and accept that spray is inevitable. Shooting from inside gives a green framing of the surrounding cliffs. The waterfall faces south-west, so afternoon and evening light (particularly in summer) comes directly into the water. Admission: free, parking approximately ISK 1,000 (as of 2026).
Skógafoss (South Iceland, Route 1): Wider and more imposing than Seljalandsfoss. The main shot from the base captures the full 60-metre drop; a staircase on the right side of the waterfall leads to an elevated viewpoint above the falls with views across the coastal plain toward the sea. On sunny days, a rainbow reliably appears in the spray from late morning until mid-afternoon. A long-exposure (1–4 seconds at f/11 with an ND filter) smooths the water into silky streaks; a faster exposure (1/500–1/1000s) freezes individual cascades. Admission: free.
Dynjandi (Westfjords): Arguably Iceland’s most dramatic waterfall, cascading in a wide fan shape from 100 metres. The remote location (a gravel road off Route 60) means significantly fewer visitors than the south coast falls. The optimal position is at the base of the upper cascade with the fan of water filling the frame. Reach it via Route 60 from Ísafjörður; driving from Reykjavik takes approximately 5–6 hours one way. No admission fee.
Long-exposure technique: Waterfalls photograph best with ND filters (6-stop or 10-stop) in bright conditions, giving 1–10 second exposures that smooth the water. In overcast light, you can achieve similar results without filters. A sturdy tripod is essential — Iceland’s winds can vibrate even a heavy carbon fibre setup, so hang your bag off the hook underneath for ballast.
Jökulsárlón Glacier Lagoon
The glacier lagoon at Jökulsárlón is a 45-minute drive east of Höfn on Route 1. Calved icebergs in blue, white and black drift across the lagoon before floating out to sea via a short channel, eventually washing up on the black sand beach known as “Diamond Beach” just south of the road.
Lagoon shots: The icebergs themselves are strongest at blue hour — the 30–40 minutes before sunrise or after sunset when the sky goes deep teal. In winter this can coincide with aurora. Stand at the eastern shore (nearest the car park) and use a long-focal-length lens to isolate individual bergs with the Vatnajökull glacier in the background.
Diamond Beach: The black sand and ice combination makes for strong abstract and close-up work. The best light comes from low sun in the morning (the beach faces east). Use a polariser to cut surface glare on the ice. Waves occasionally approach faster than expected — keep a close eye on sets and never position yourself between a berg and the water.
Boat tours: Zodiac and amphibious vehicle tours take you among the icebergs for approximately ISK 7,000–12,000 per person. Valuable for perspective shots from water level that are impossible from shore. Book in advance at glacierlagoon.is.
Midnight Sun Photography
Between late May and mid-July, the sun doesn’t fully set in Iceland. For photographers, this creates a sustained golden hour around midnight — a narrow band when the sun dips to its lowest point on the horizon and the light goes warm and directional without disappearing.
The midnight sun window: In Reykjavik the lowest dip occurs around midnight in June. Drive north — to Akureyri or the Westfjords — and the sun stays higher still. On a clear night, the combination of 2am golden light on a still lake or a mountain reflection is as close to a guaranteed great photograph as Iceland gets.
Recommended midnight sun locations:
- Lake Mývatn: The lake’s volcanic landscape, reflections, and birdlife combine with the midnight sun. The pseudo-craters at Skútustaðir are particularly strong around midnight in June.
- Landmannalaugar (accessible July–early September on F-roads): The rhyolite mountains turn extraordinary colours under low-angle sun. The highland hut at Landmannalaugar is a viable base.
- Grundarfjörður (Snæfellsnes): Kirkjufell under the midnight sun, without the need for aurora, gives a warmer alternative to the winter shot.
Permits and Access Notes
Most photographic access in Iceland is unrestricted for personal and editorial use. Specific situations where restrictions apply:
- Þingvellir National Park: Commercial shoots and advertising photography require a permit from the national park authority. Personal photography is unrestricted.
- Vatnajökull National Park (including Jökulsárlón adjacent areas): Similar commercial permit requirements. Check at ust.is.
- Private land: Iceland’s Right of Access (allemannaréttur) allows walking on private land but does not extend to camping or commercial activity without permission. Most farmland is accessible for passing through.
- F-roads: Highland roads marked F are only legally accessible with a 4WD vehicle with high clearance. Taking a standard 2WD on F-roads invalidates your rental insurance and risks serious damage. Check road conditions at road.is before any highland journey.
Gear for Iceland
Camera body: Weather sealing is strongly recommended. Salt air at coastal locations and driving rain will test unprotected gear quickly. A sealed mirrorless or DSLR body handles Iceland’s conditions well; point-and-shoot cameras suffer.
Essential accessories:
- Tripod: carbon fibre tripod rated to at least 5kg load for stability in wind
- ND filters: 6-stop and 10-stop for waterfall work
- Circular polariser: reduces surface glare and deepens sky at coastal locations
- Remote shutter release or 2-second timer for long exposures
- Rain cover for the camera body
- Extra batteries: cold drains lithium batteries to critical levels unexpectedly — carry 2–3 spares and keep one in an inside pocket
- Microfibre cloths: spray from waterfalls and sea mist require regular lens cleaning
- Dry bag: to transport gear safely between locations in wet weather
Phone backup: Iceland’s LTE coverage is good on the Ring Road. A phone with a quality camera and the Aurora Forecast app (or vedur.is for weather) is a genuinely useful second device.
Practical Photography Logistics
- Car hire: A rental car is effectively mandatory for reaching most photography locations outside Reykjavik. Book early — summer demand is very high. 4WD is required for highland locations.
- Guided photography tours: Several Reykjavik-based companies offer small-group photography-specific day tours and northern lights tours (typically ISK 18,000–35,000 per person). These provide transport, local knowledge of current conditions, and instruction. Worth considering if you’re unfamiliar with Iceland’s geography.
- Weather changes fast: A cloudless forecast at 6pm can become rain and fog by 10pm. Monitor vedur.is hourly during active shooting periods and have alternative interior subjects planned (hot springs, geothermal areas, cafés with volcanic views) for when the sky closes.
Iceland doesn’t always cooperate. But when the conditions align — the aurora dancing over a glacier lagoon at midnight, or the midnight sun turning a volcanic ridge to copper — the images are among the most compelling any camera can record.
Search hotels in Iceland on Booking.com
Plan Your Trip
✈️ Book your flights to Iceland 🛡️ Get travel insurance 📱 Stay connected with an eSIM 🚗 Rent a car